

写真が上手くなるには構図が必要らしいけど、構図ってそもそも何?
そんな疑問にお答えいたします。
今回の記事では、構図とはなにか?という疑問にお答えいたします。
構図をマスターするメリットやどんな構図があるのかについて、作例写真を使って分かりやすく解説していきます。
構図については、簡単なものから上級者編まで13種類をご紹介。
このブログで読者様の写真の疑問が解決しますように。

そーいち
- FUJIFILMのカメラを愛用&大好き
- 関西の観光地での写真を撮ることが趣味
- カメラの気になる疑問を解決するブログをやってます
構図を活用すると写真が上手くなります
結論、構図を活用すると写真が上手になります。
写真を見て「綺麗」「美しい」「素敵だな」と感じるのには理由があります。
その理由を深掘りしていくと構図に辿り着きます。
構図を活用するメリットはこちら。
- 写真に安定感が出る
- 見ていて心地良さを生んでくれる
- バランスが良く見える
- 主題がハッキリする
写真は「なんとなく美しい」のではなく、「構図が整っているら心地良く感じる」場合がほとんど。
構図を写真に取り入れることで、より多くの人がいいと感じる確率を飛躍的に上げることができます。
「俺は俺流の写真があるねん」ってな方もおられますが、俺流の良さを分かるのはその人だけ。
構図を取り入れることで、あなたが写真で伝えたい世界観がより多くの人に受け入れられるようになります。
何事もまずは基本から。
今回はそんな構図の基本から応用までをガッツリご紹介してまいります。

構図とは?

写真の構図とは、画面構成のことをいいます。
分かりやすくいうと、人が写真に対して『心地良い』と感じるパターンのこと。
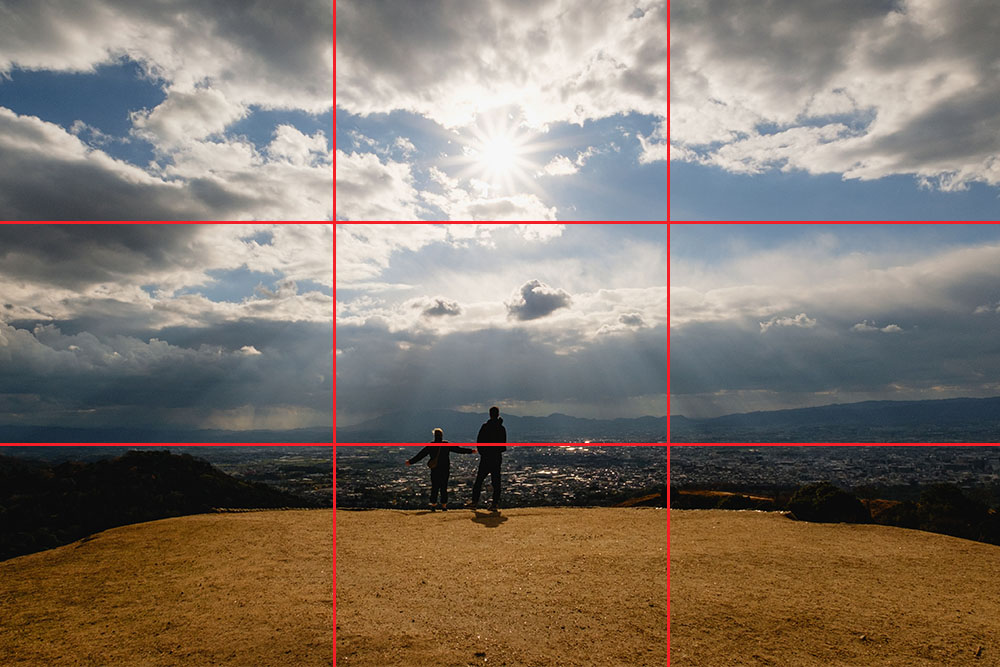
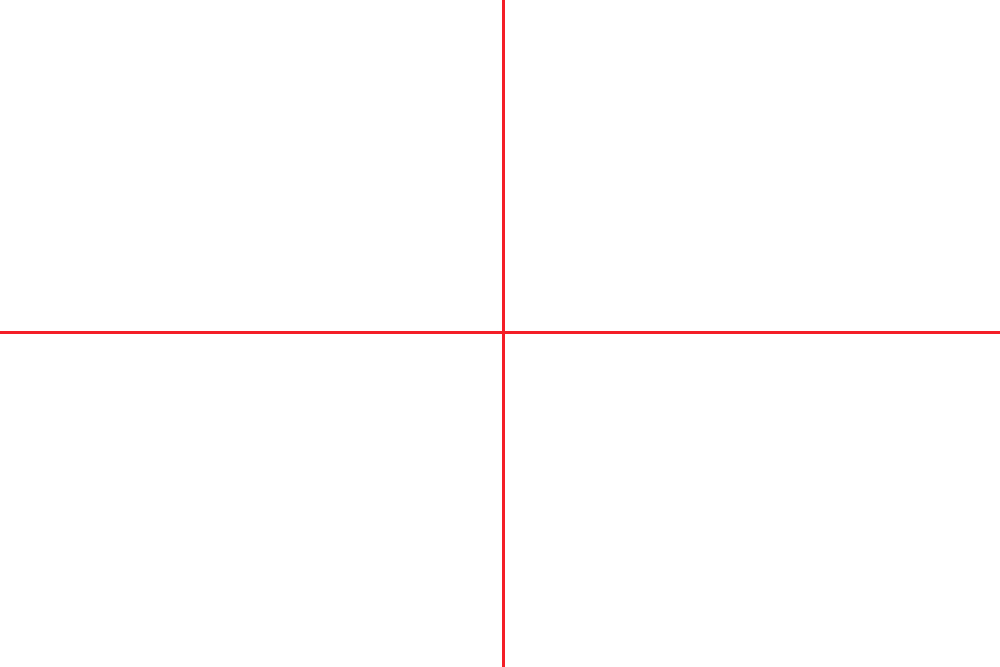
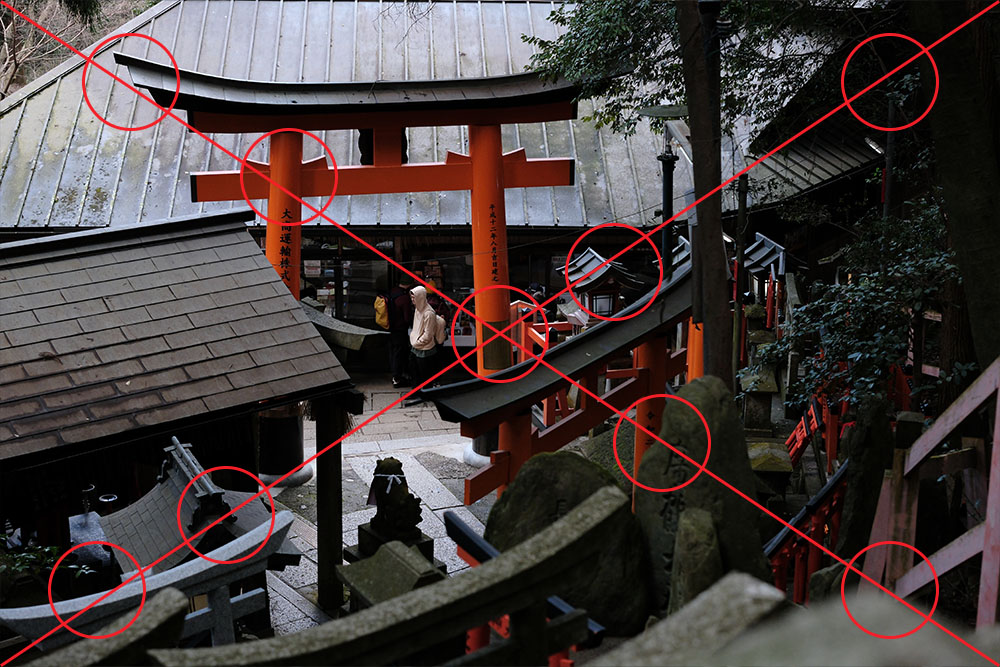
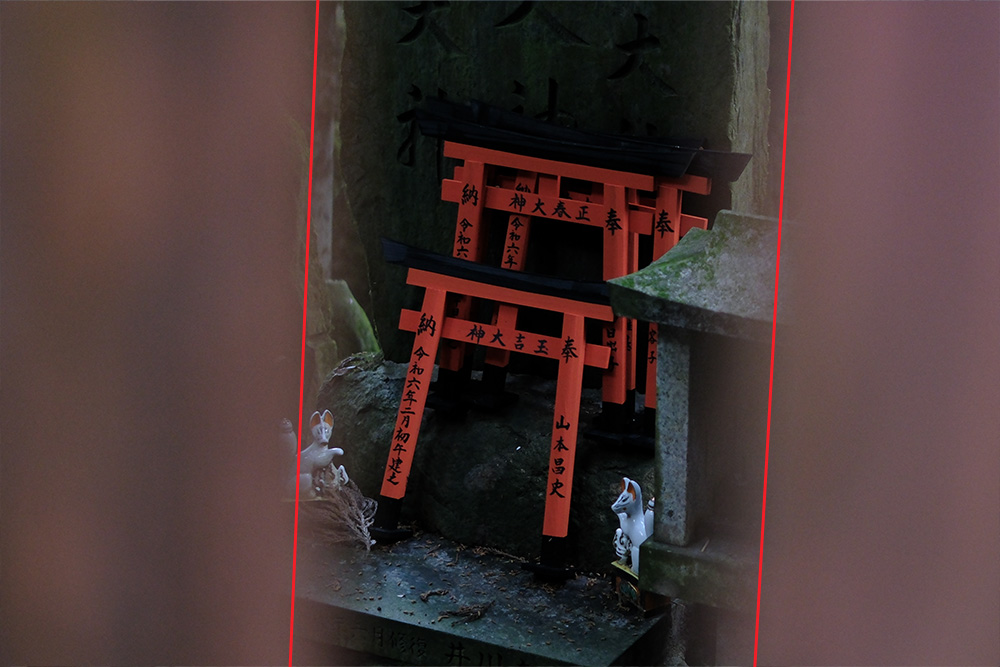
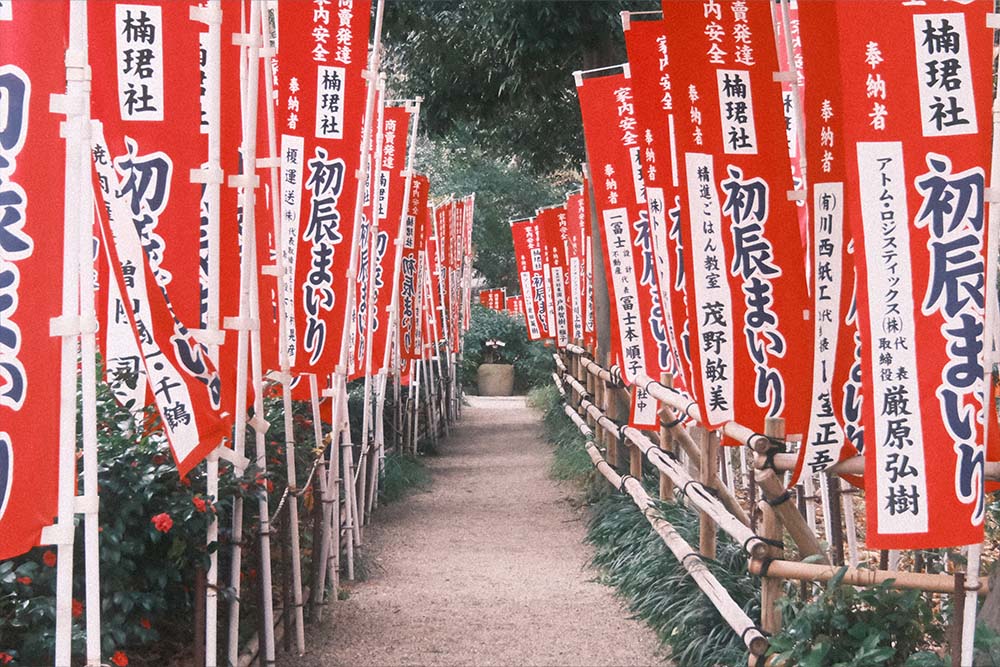
構図のイメージはこんな感じ。
後ほど詳しく解説しますが、こちらは三分割構図です。
赤色で示した線が構図線。
この構図線を感じられる写真に対して、人は心地良さを覚えます。
構図にはいくつかのパターンがあるので、その引き出しをたくさん増やしましょう!というのが当ブログからのご提案でございます。
構図で写真が上手くなる理由
構図で写真が上手くなる理由は安定感にあります。
こちらの画像をご覧下さい。

2つの三角の向きを変えて配置しました。
右の三角はなんだか不安定な感じがします。
対して左の三角は倒れそうな感じではなく、どっしりとした安定感を感じます。
これが構図の安定感です。
このように、構図を意識することで写真に安定感が生まれて、それが上手な写真に繋がります。
お次の項目では、長い年月をかけても色褪せない、最強の構図を13種類ご紹介。
構図を種類別に解説

構図の重要性が分かったところで、具体的な構図のパターンをご紹介してまいります。
二分割構図
講座の中でも比較的簡単に取り入れやすいのがこの『二分割構図』です。
二分割構図は上下と左右のどちらかを均等に分割した構図のことです。

比較作例のように、水平線を真ん中に置くパターンが基本の構図です。
また、後ほどご紹介する『日の丸構図』のような、真ん中に被写体を配置する構図との組み合わせは相性がいいです。
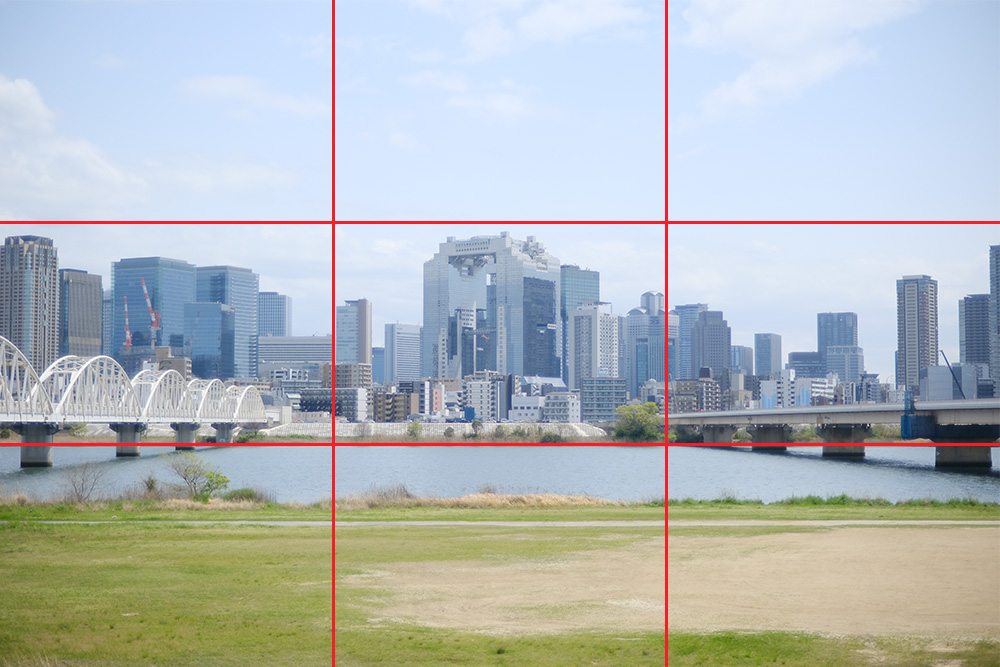
作例

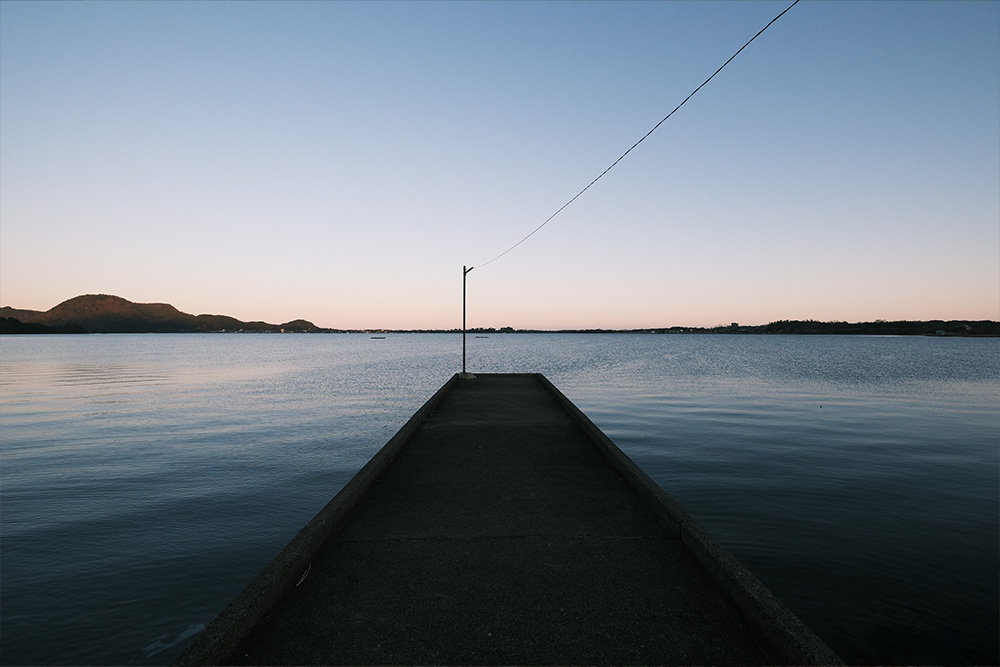
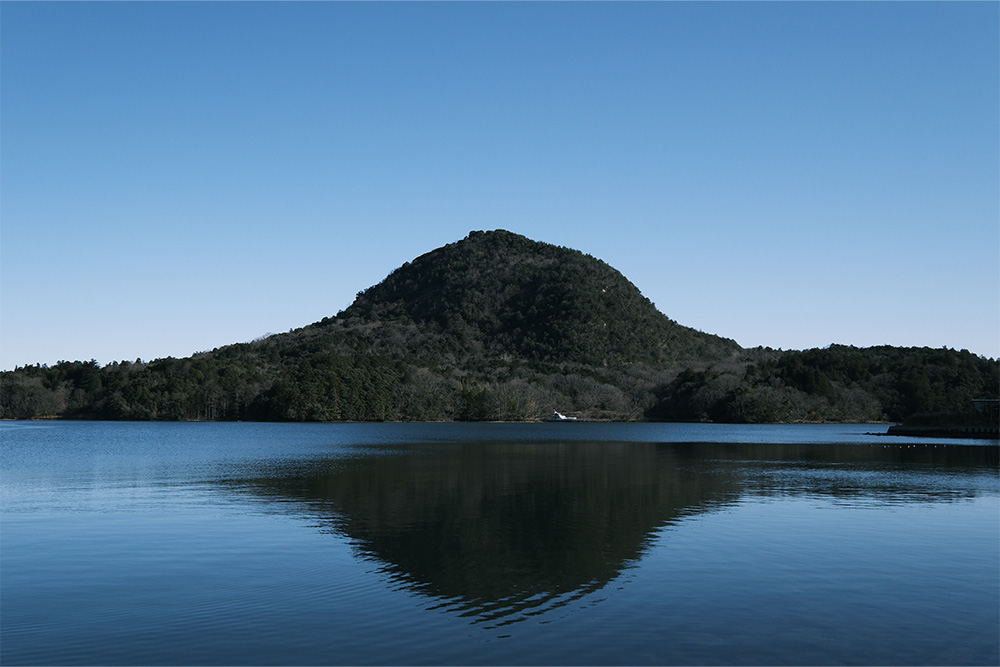
写真のような水平線を使用した風景写真と相性がいい構図です。
奥に山などの突起物があっても、色が違えば二分割構図は成立しやすいです。
完全な直線ではなくとも、作例のように線を感じさせる写真と相性がいいですね。
三分割構図

構図の中でも有名なのが、この『三分割構図』です。
上下と左右を均等に三分割した構図のことをいいます。
三分割のライン上に水平線や被写体を配置することで、安定感のある構図になります。
また、線が交差する地点に被写体を配置したり、それぞれを組み合わせることでより安定感が増します。
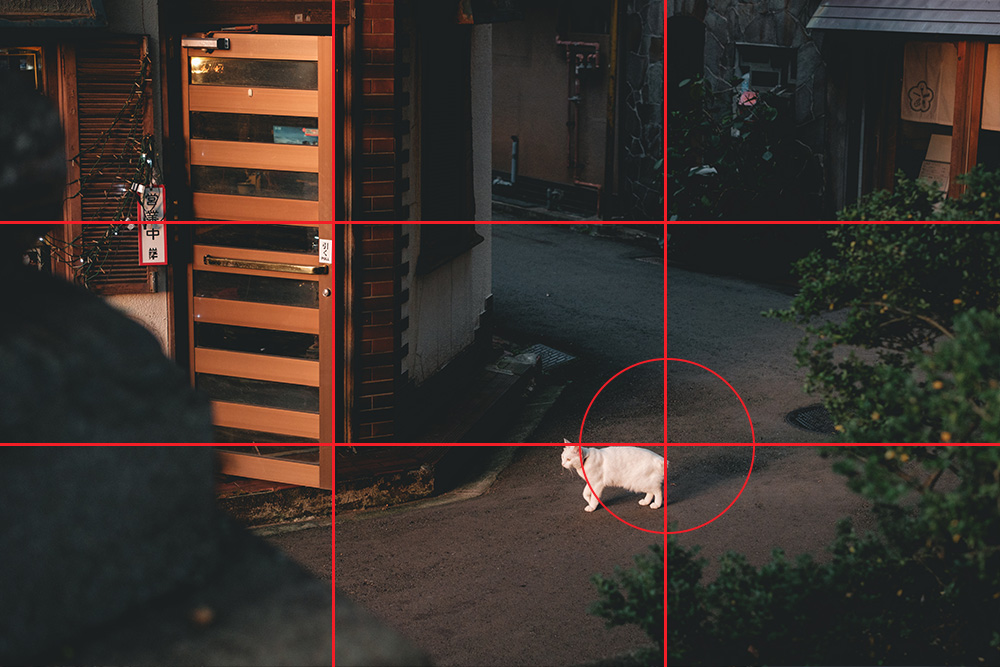
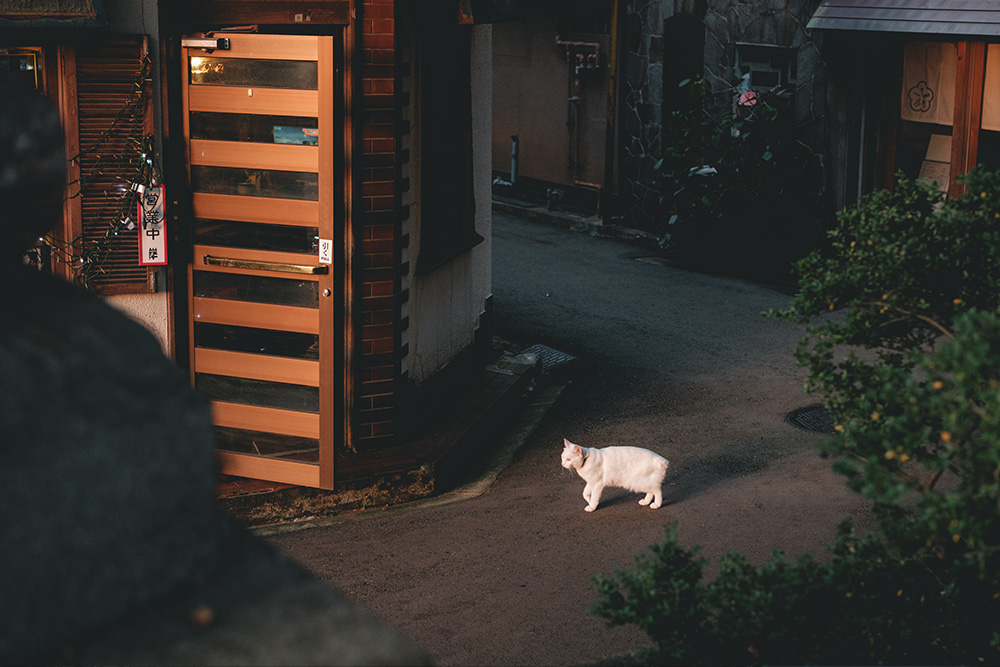
作例写真はドアのラインと、猫の位置に三分割構図を活用しました。
作例のように、三分割のラインを2つ以上活用できると、より安定感の高い写真に仕上がります。
作例

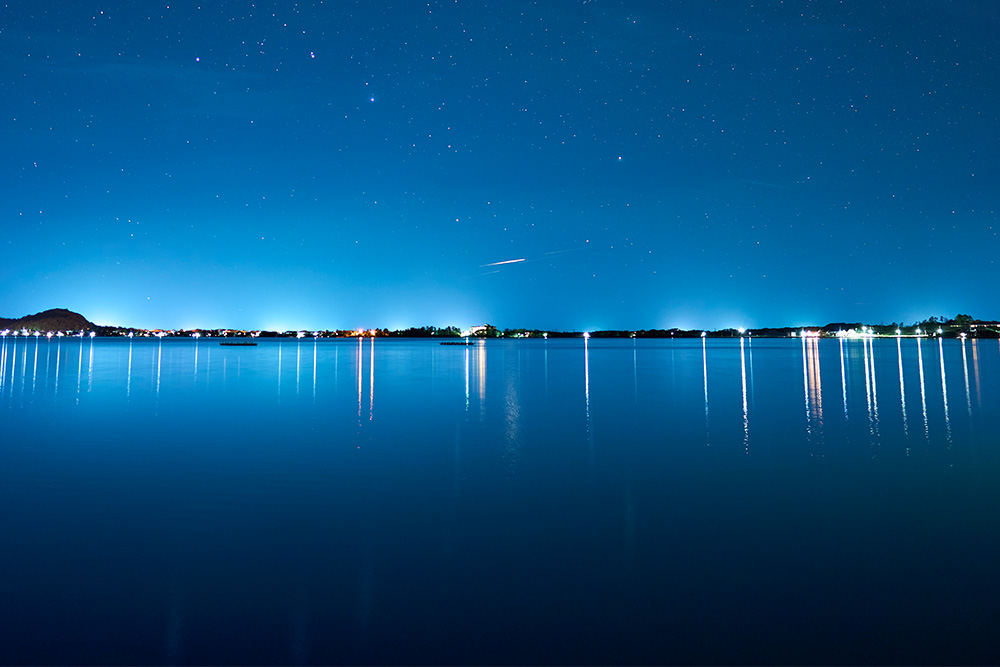
こちらは三分割の横のラインを意識した作例です。
二分割構図と同様、地平線と水平線に相性がいい構図です。
特に空を広く見せたい場合は三分割のほうが効果的です。
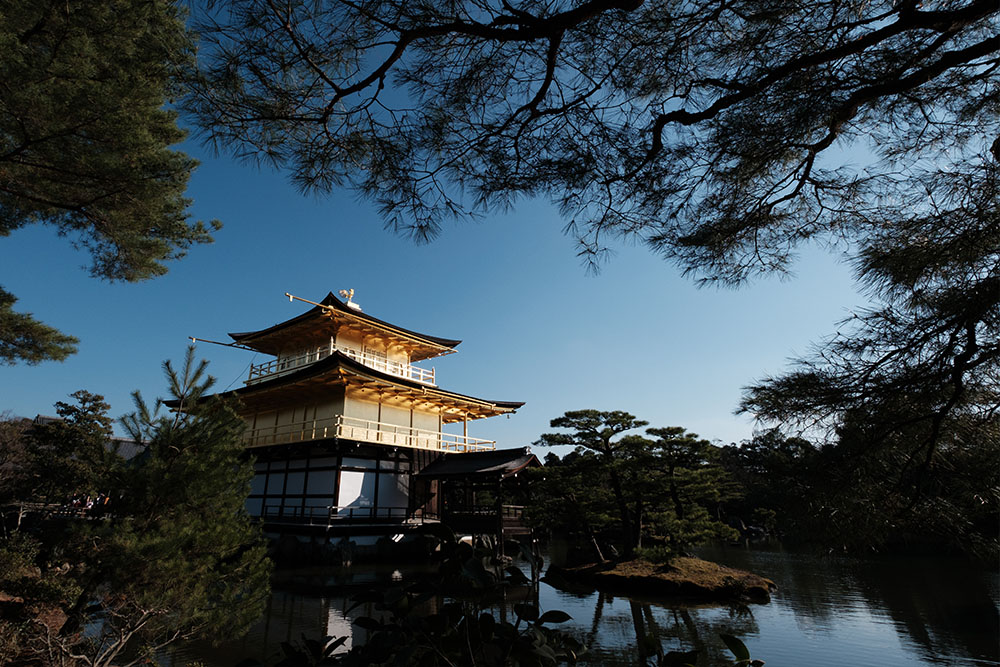
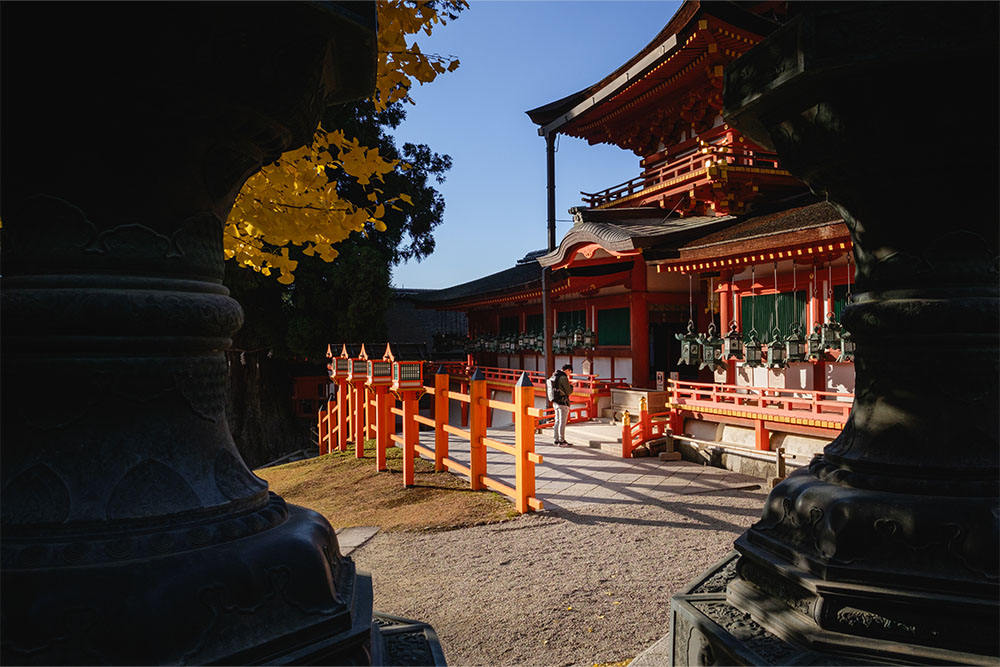
こちらは三分割のラインと交差する位置に金閣寺を配置する工夫をしました。
三分割構図の利点は、線の交差点に被写体を置くだけで構図が成立する簡単さにあります。

こちらは山のラインを三分割構図に当てはめました。
完全な地平線でなくとも、ラインが見えれば安定感のある構図になります。
日の丸構図
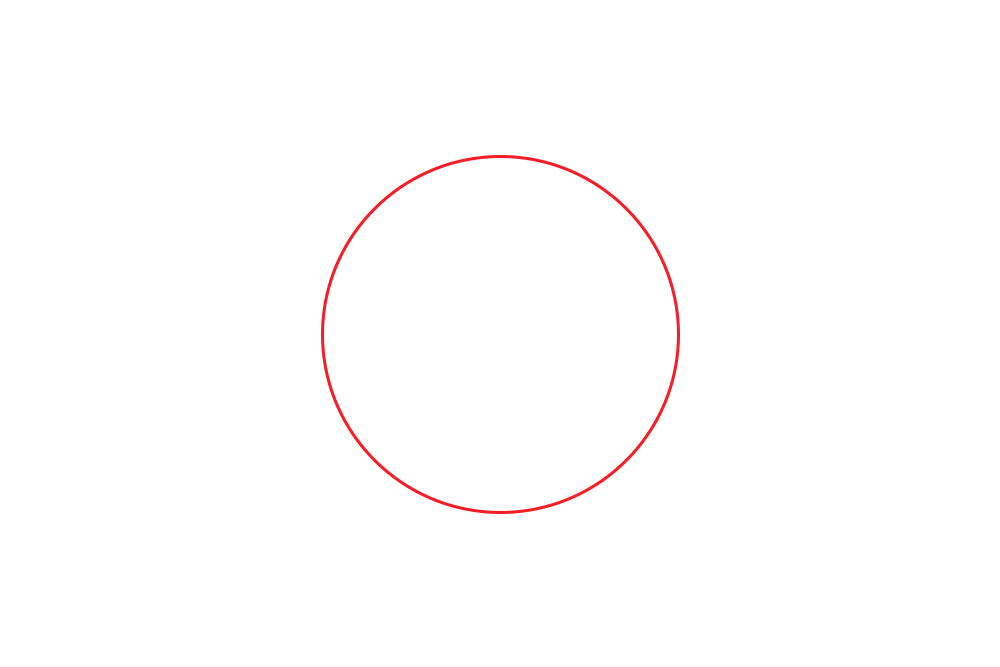
誰でも簡単に取り入れられる構図が『日の丸構図』です。
写真の中央に撮りたいものを配置することで成立する構図です。
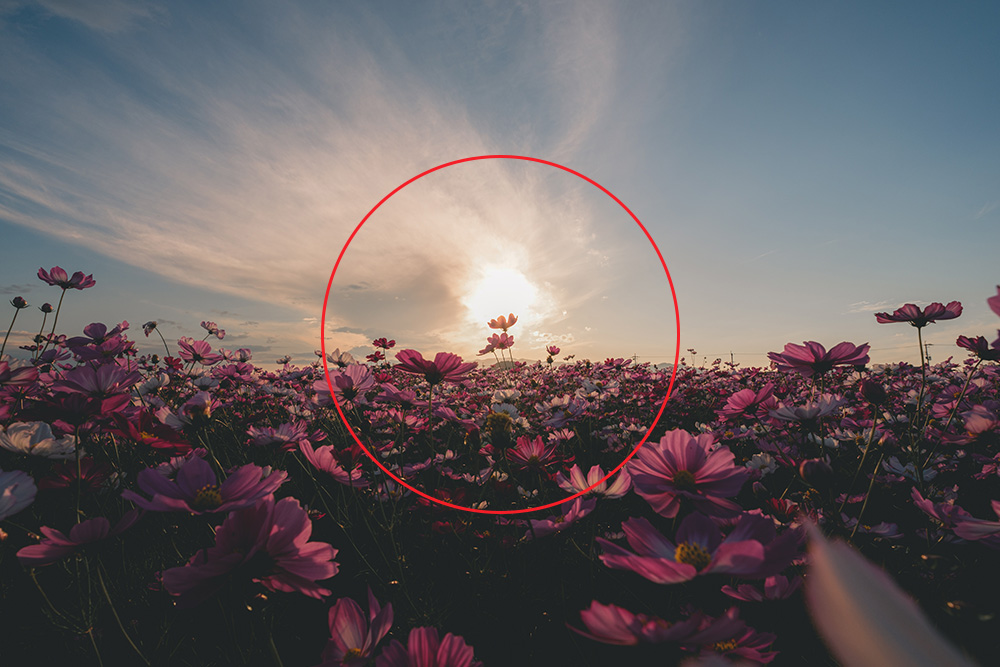

作例では夕日と太陽を日の丸構図に当てはめました。
日の丸構図は簡単に取り入れられますが、同じ構図ばかりだとマンネリ化してしまいます。
工夫をするとすれば、作例のように『二分割構図』と組み合わせるとオリジナリティある構図になります。
作例
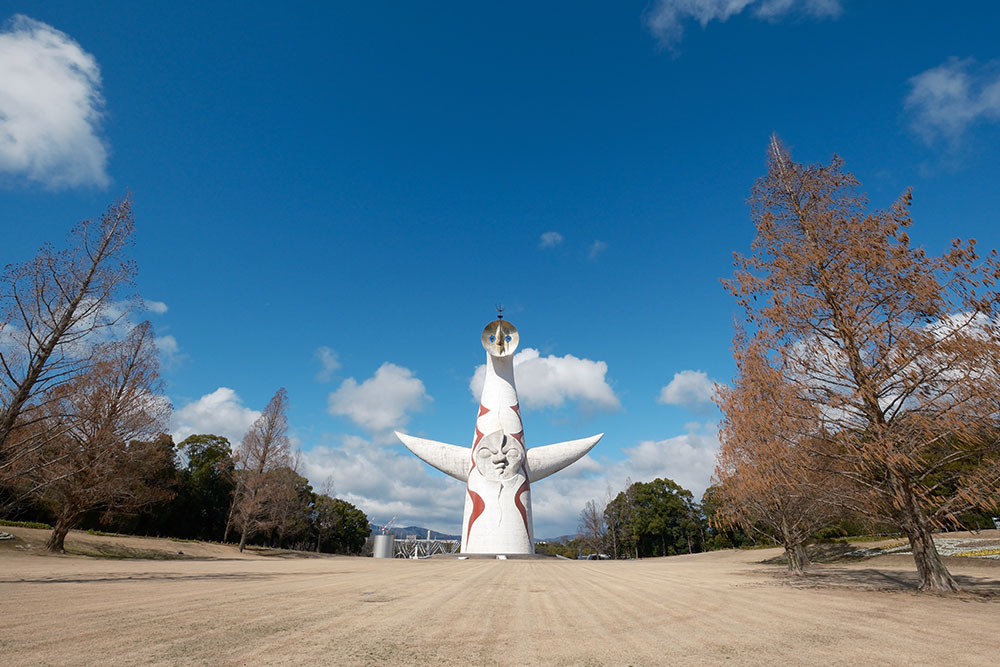
作例はシンプルな日の丸構図です。
太陽の塔のように、中心部分に丸を配置すると日の丸構図感が強くなります。

こちらは日の丸構図をベースに他の構図を組み合わせた作例です。
後ほどご紹介いたします、『対角線構図』と『サンドイッチ構図』を日の丸構図に組み込みました。
構図を掛け合わせることで、オリジナルティある構図になります。
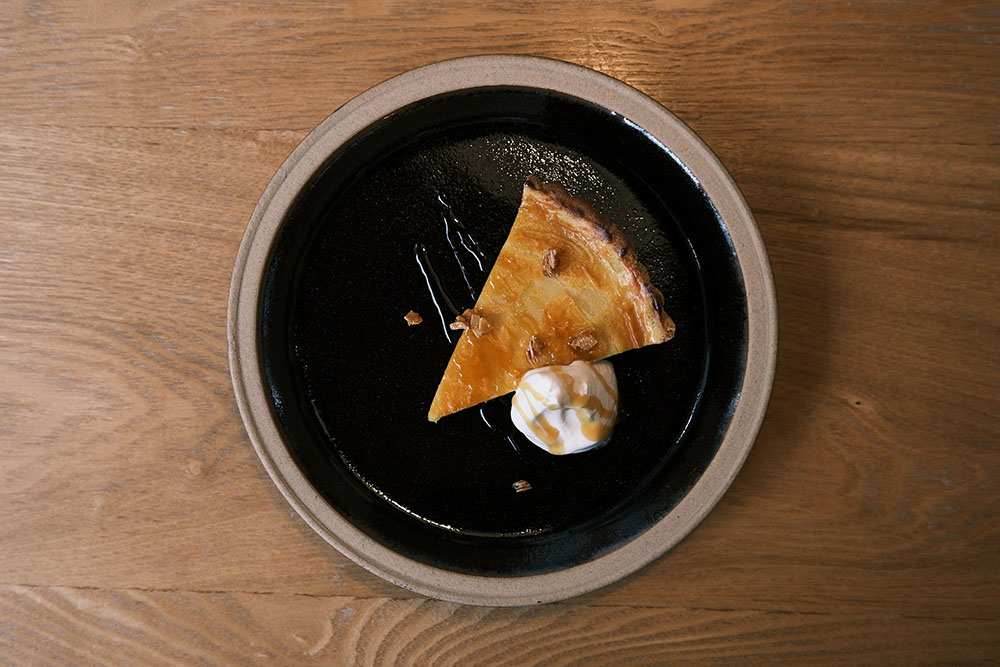
日の丸構図は、テーブルフォトに適した構図です。
丸いお皿ならば構図の安定感はさらに増すので、より真ん中のケーキに視線を誘導することができます。
三角構図

お次は意識をするだけで簡単に取り入れられる『三角形構図』のご紹介。
シンプルに三角をモチーフとした構図です。
写真のように、山を撮ると簡単に三角構図を得られます。
目に映る景色の中に、三角を感じるモノがあれば簡単に取り入れることができます。
作例

三角形構図のメリットは、三角の場所はどこでもよく、何個あっても良い点にあります。
作例には2個三角を見つけることができました。
このように、たくさん三角があると写真にリズムが生まれるので風景写真に取り入れやすい構図です。

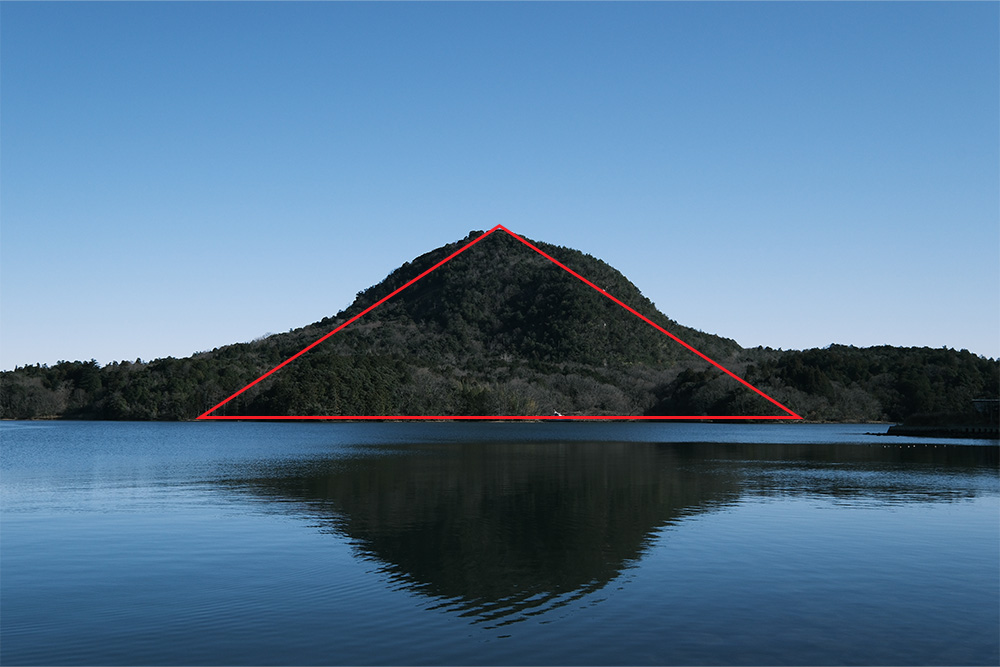
昼間の太陽を頂点に、水平線が大きな三角を作ってくれました。
また、奥の山々も三角があるので、シンプルながらリズムのある写真に仕上がりました。
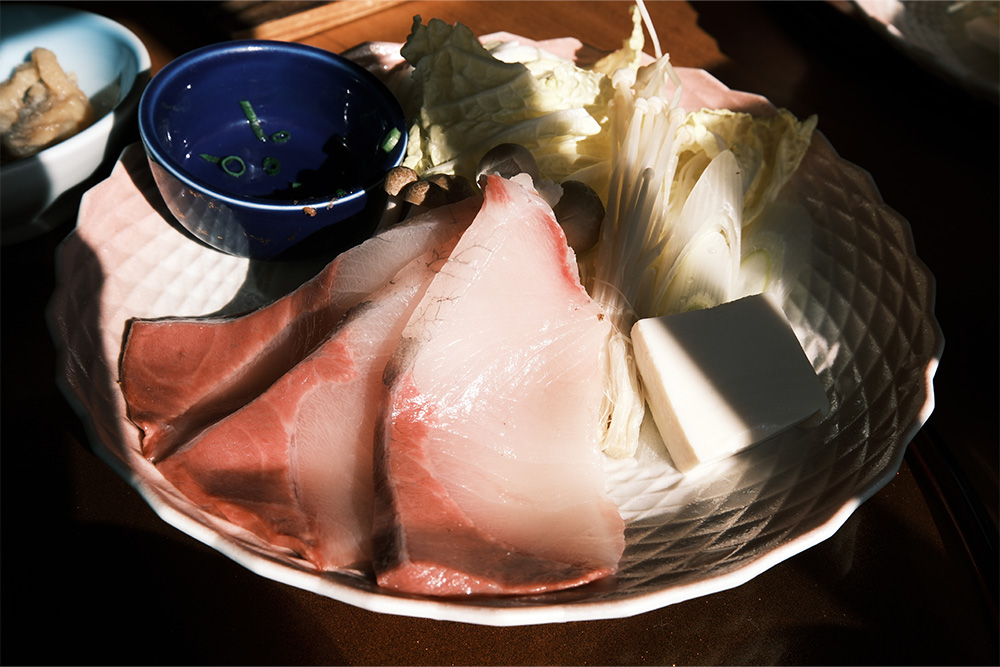
ぶりのしゃぶしゃぶを撮影しました。
ブリの切り身が作る斜めのラインと、影を活かして三角が生まれました。
山のようにそれ自体が三角である必要はなく、三角のラインがなんとなく感じられる程度でも構図として成立します。
対角線構図
対角線上に被写体を配置する、もしくはそのラインを感じさせる構図を『対角線構図』といいます。


作例のように、片方のみでも成立する構図です。
対角線構図は写真に動きが生まれるので、アクセントとして活用できます。
しかし、斜め線を意識し過ぎると、ラインが分かりやすいだけに同じような写真になりがちなので、使い過ぎには気をつけましょう。
作例

まずはシンプルに対角線構図です。
鉄のラインが対角線を強調するとともに、対角線がたくさんあるので写真にリズムが生まれます。

お次の作例は同じモチーフの点を対角線上に配置した写真です。
インパクトのあるモチーフを並べることで対角線を強調した構図を作れます。

最後の作例は応用編。
実際にラインがなくても、点が繋がって線に感じられると構図が成立します。
明確にライン上になくても、対角線を感じさせるラインさえあれば安定感のある構図になります。
放射線構図

こちらは『放射線構図』です。
放射線構図には奥行きが感じられる写真と相性が良いです。

作例のように人工的な奥行きを感じる建物、道で成立しやすい構図です。
また、線が中央で交差するので、作例のように日の丸構図も意識するとより構図に面白さが生まれます。
作例

こちらは金沢市の古風な建物が残るひがし茶屋町です。
建物が中央の柳に向かって収束していくのがよく分かります。
運よく柳のみに太陽が当たっているので、より日の丸構図の要素も強くなっています。
このように人工的な建物が立ち並ぶ場所で活用しやすい構図です。
こちらの作例はフルサイズ換算15mmの超広角レンズで奥行き感を強調した写真です。
中央付近に向かって線が集まる感じが写真に動感を与えています。

放射線構図の収束点は必ずしも中央である必要はありません。
作例のように、中央を外れた写真でも、放射線を感じさせる構図であればOK。
C字構図
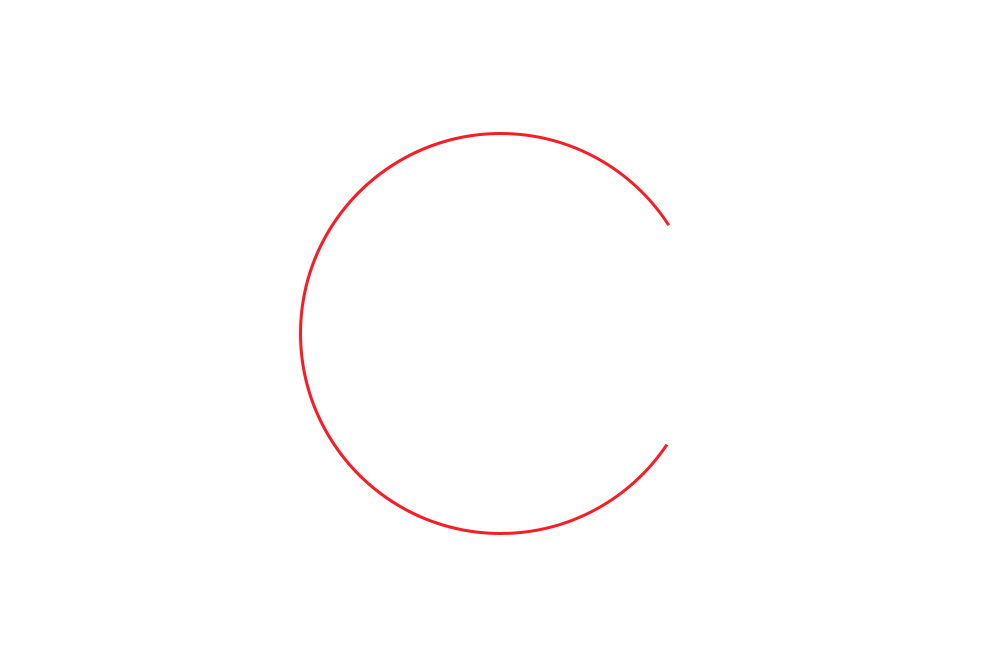
こちらはテーブルフォトや接写で使える『C字構図』です。
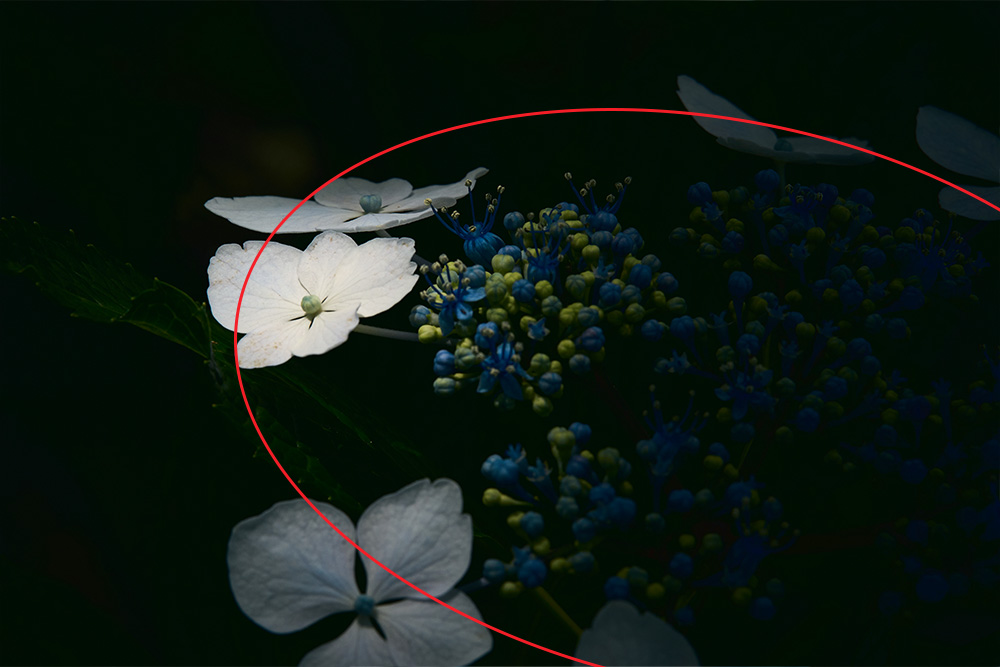

紫陽花の花を接写した作例です。
花はもともと円形のものが多いので、あえてグッと寄ってC字構図を意識した写真です。
このように、マクロに近い寄りの写真で効果を発揮しやすい構図です。
作例

C字構図の代表的な撮り方です。
お皿をあえて画面から切ることでC字のリズムが生まれます。
日の丸構図と同様、テーブルフォトに向いた構図です。
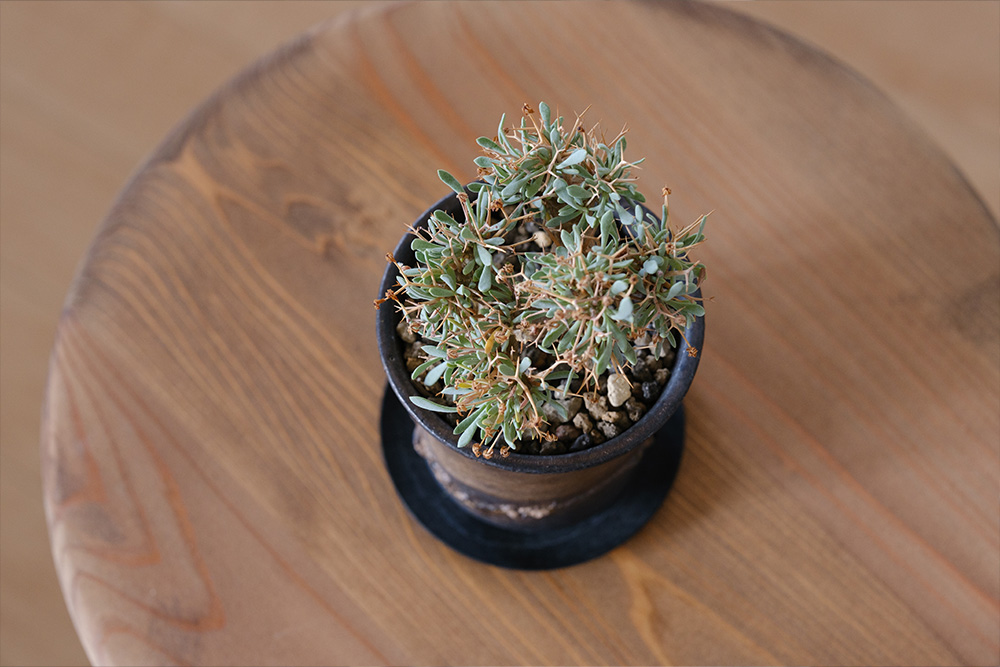
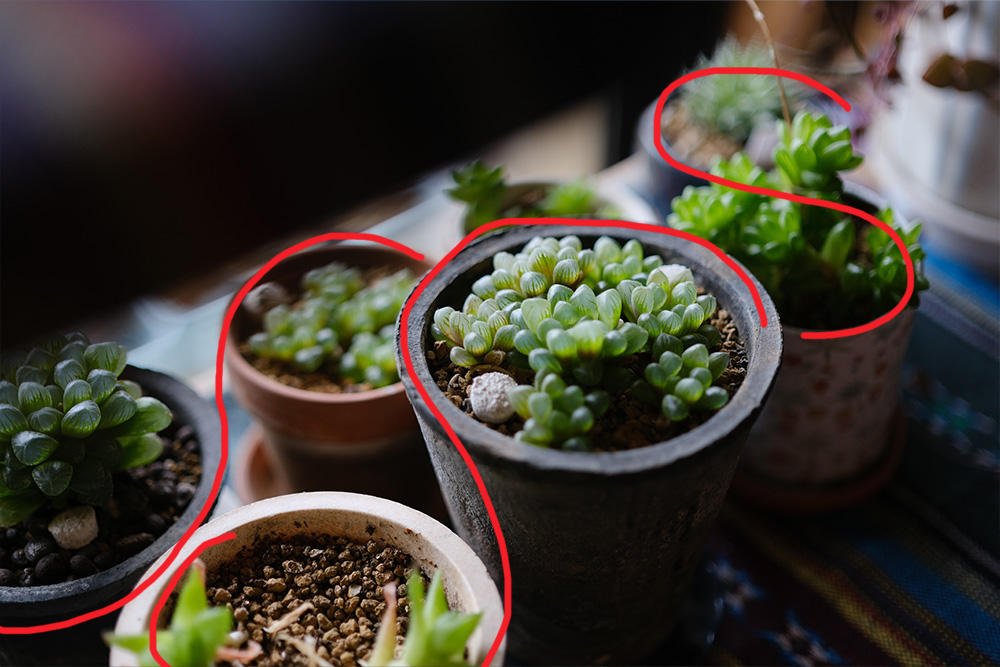
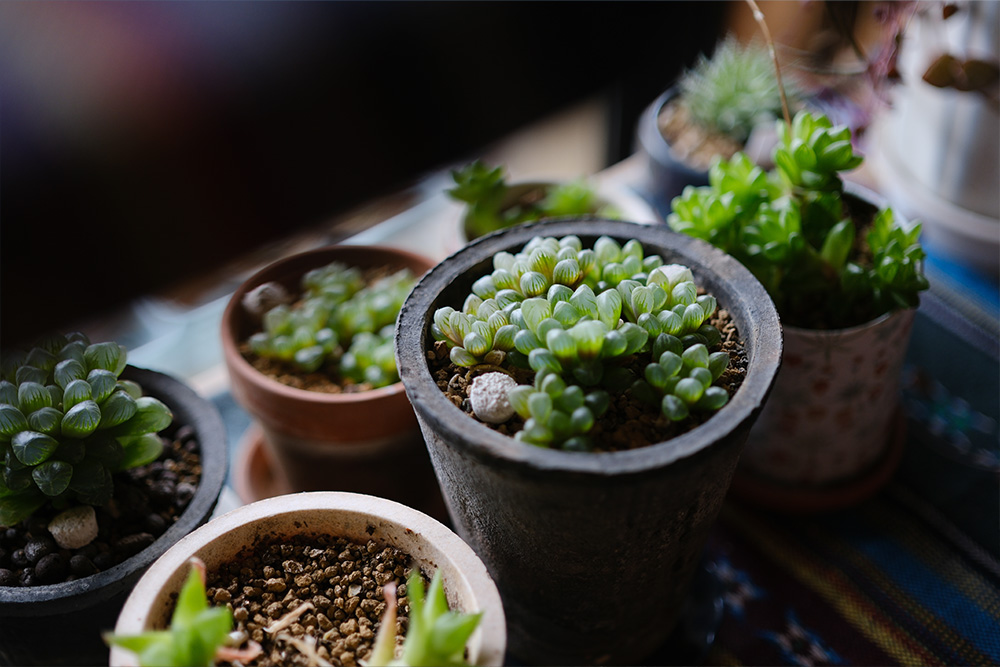
こちらは観葉植物の写真です。
台の部分でC字を作っています。
また、近いモチーフである円形を入れることで、それぞれにリズムが生まれました。
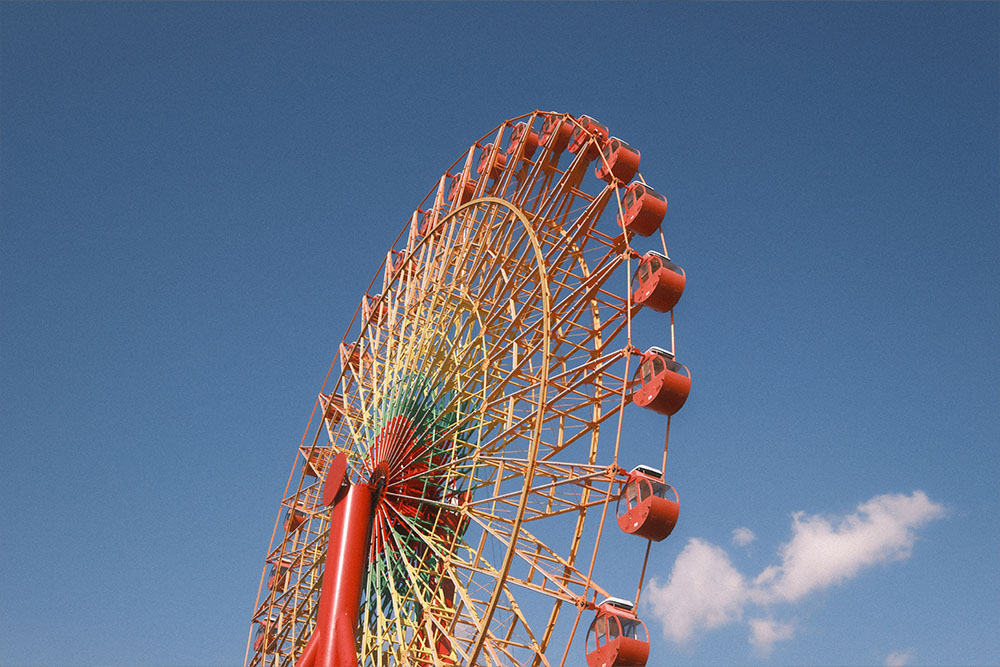
お次は観覧車です。
観覧車のゴンドラが連続してできるC字と鉄骨のC字、そして全体的に感じられるC字。
このように、一枚の写真にたくさんのC字を感じられるモチーフが入るとより安定感のある写真に仕上がります。
額縁構図
読んで字の如く、額縁の中に被写体を収めるのが『額縁構図』です。
あえて額縁を取り入れることで、額縁の中の被写体に視線が誘導されて、心地良い写真の雰囲気になります。
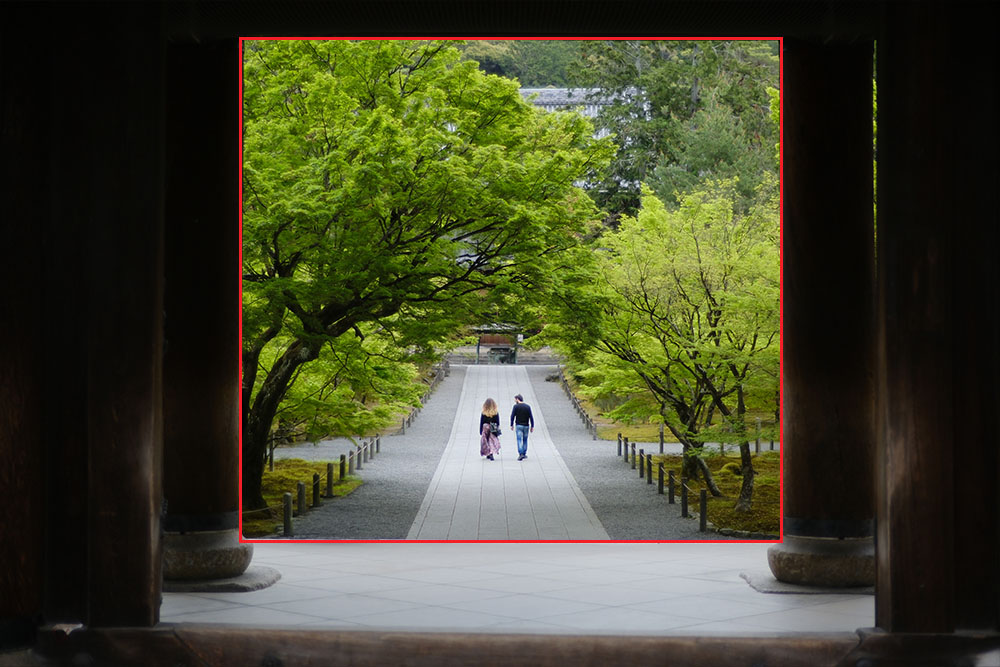
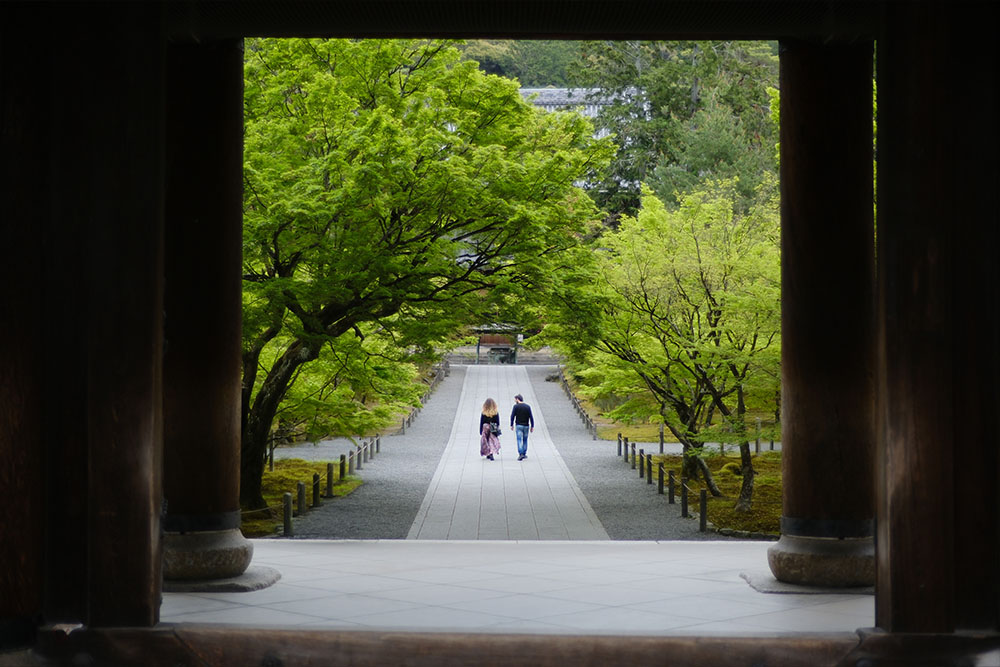
作例は南禅寺の入り口にある大きな門を利用して額縁構図を狙いました。
額縁構図も日の丸構図や三分割構図と組み合わせることで、面白みのある構図になります。
作例
こちらは額縁構図と三分割構図を組み合わせています。
穴や隙間から覗くように撮ると成立しやすい構図です。

こちらは額縁と自転車の少女でできる三角形構図が合わさっています。
額縁構図は、この作例のようにF値を解放気味にして前と後ろをぼかすことで、主題が明確に強調されるメリットがあります。
額縁構図はほかのいろんな構図と組み合わせが自在なので、オリジナリティを発揮しやすい構図です。
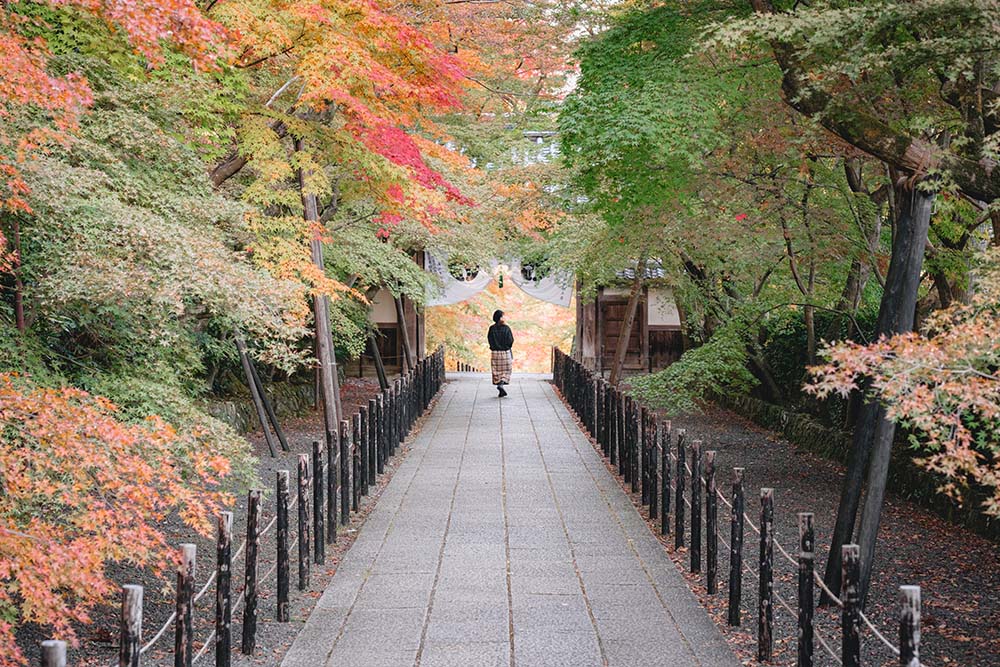
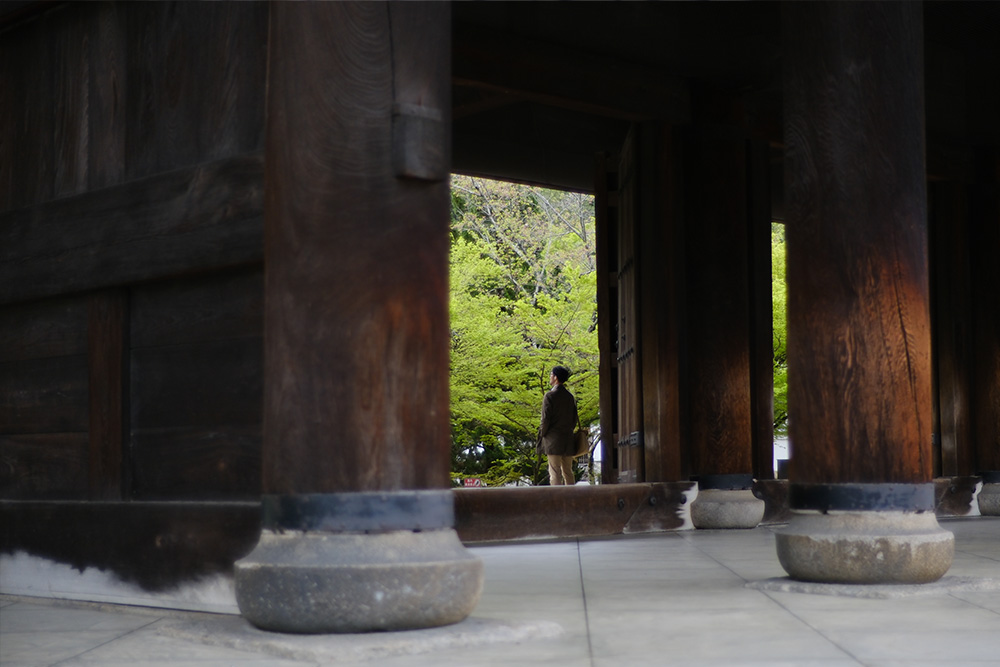
トンネル構図

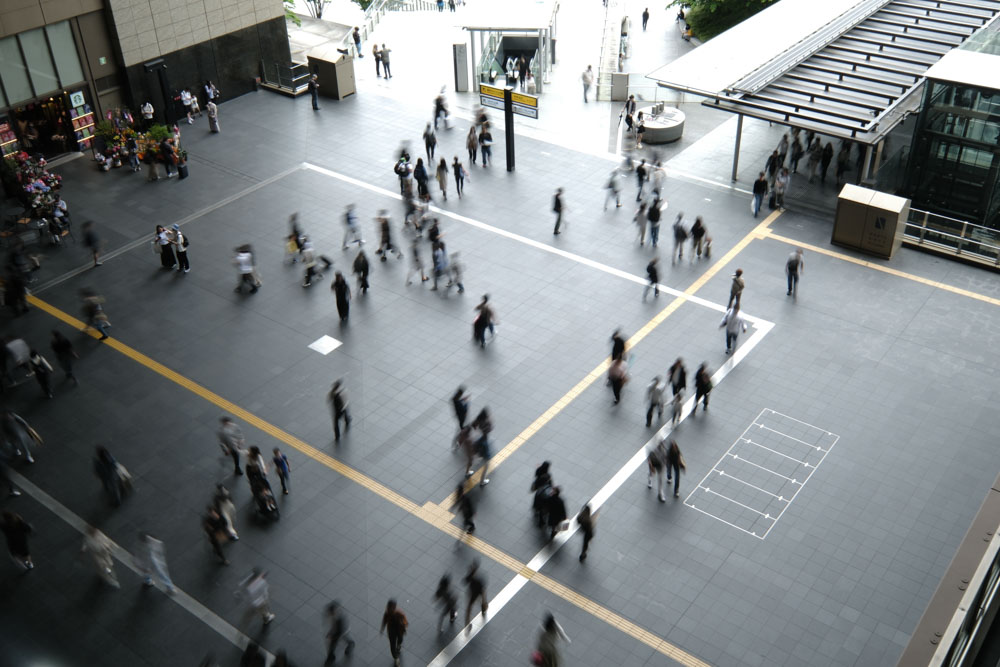
まるでトンネルの中を覗いているかのような構図を『トンネル構図』といいます。

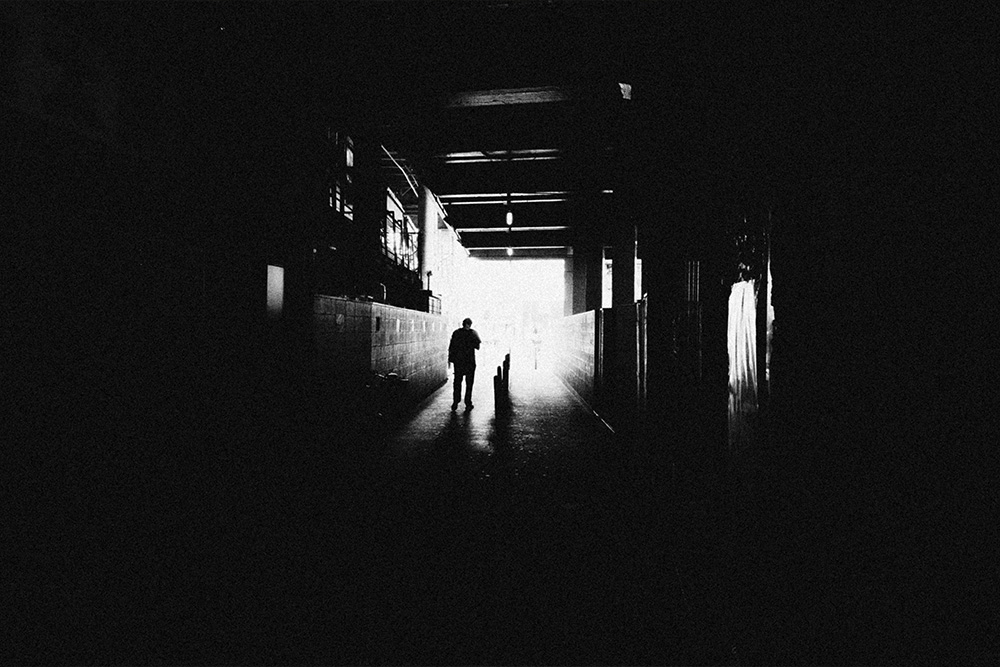
作例のモノクロ写真は、中心の人が外に向かって動いている動感をトンネル構図で強調してみました。
先ほどの放射線構図と同じく、奥行きを感じる写真に使いやすい構図です。
作例

放射線構図と理屈は同じですが、写真の中でのロケーションが大きく異なります。
放射線構図はあくまで放射線であったのに対して、トンネル構図は明暗差や前ボケを活かして、トンネルの中を覗くようなイメージの構図です。
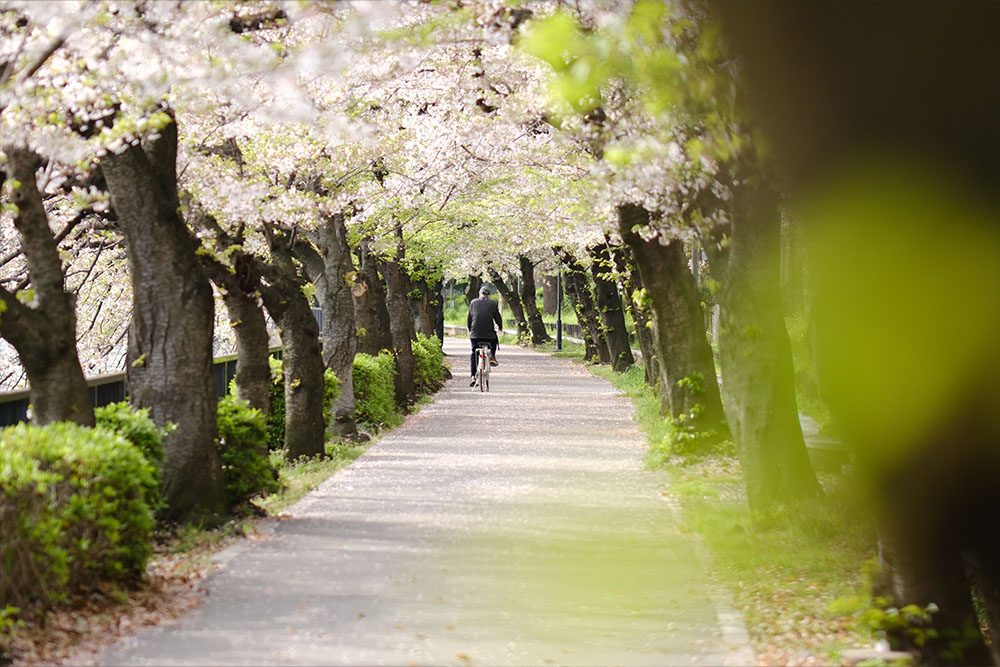
こちらは放射線構図でもあるのですが、桜並木のトンネルを覗いているかのような雰囲気が前ボケで強調されているのでトンネル構図の位置付けにしております。
このように曖昧な部分もありますので、あくまで構図による安定感があるかを意識しましょう。
実際のトンネルっぽい場所でなくても、手前から覗くような構図にできればトンネル感が出てきます。
これも被写体を強調する効果があるので、ありきたりな写真の味付けにトンネル構図を使うとユニークな写真に仕上がります。
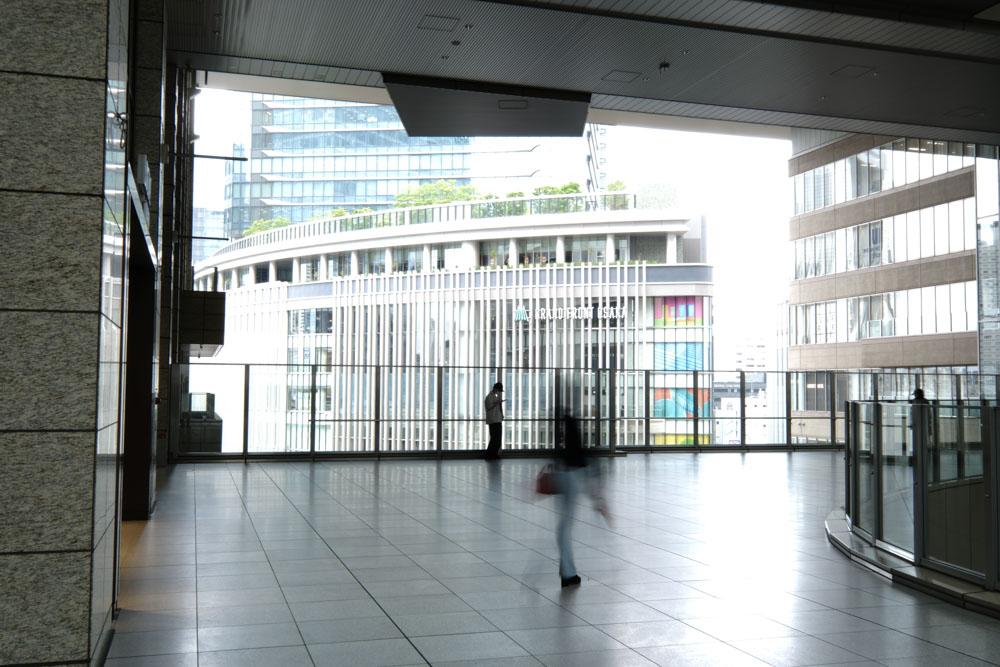
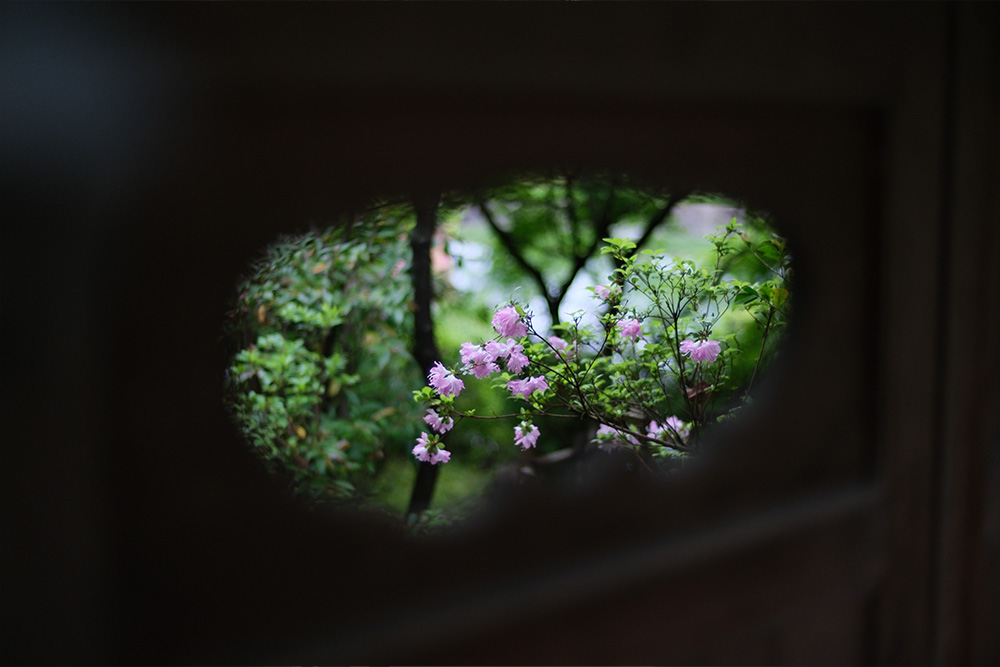
サンドイッチ構図

『サンドイッチ構図』は、左右か上下で挟まれているように感じる構図のことです。

まるで、ドアとドアの隙間からこっそりと覗き込むような構図となり、その先にある被写体がより強調されます。
作例

左右のビルを使って、真ん中の梅田スカイビルをサンドイッチしました。
ありきたりな日の丸構図にリズムが生まれます。

こちらはチューリップの花々の間から覗き込むように撮影した作例です。
作例のように、前ボケを活かすことでサンドイッチ構図の効果は最大化されます。

サンドイッチがなければ、ただのキツネの石像です。
あえて覗き込む雰囲気を演出することで、見ているの視線が自然に被写体へと向かう安定的な構図です。
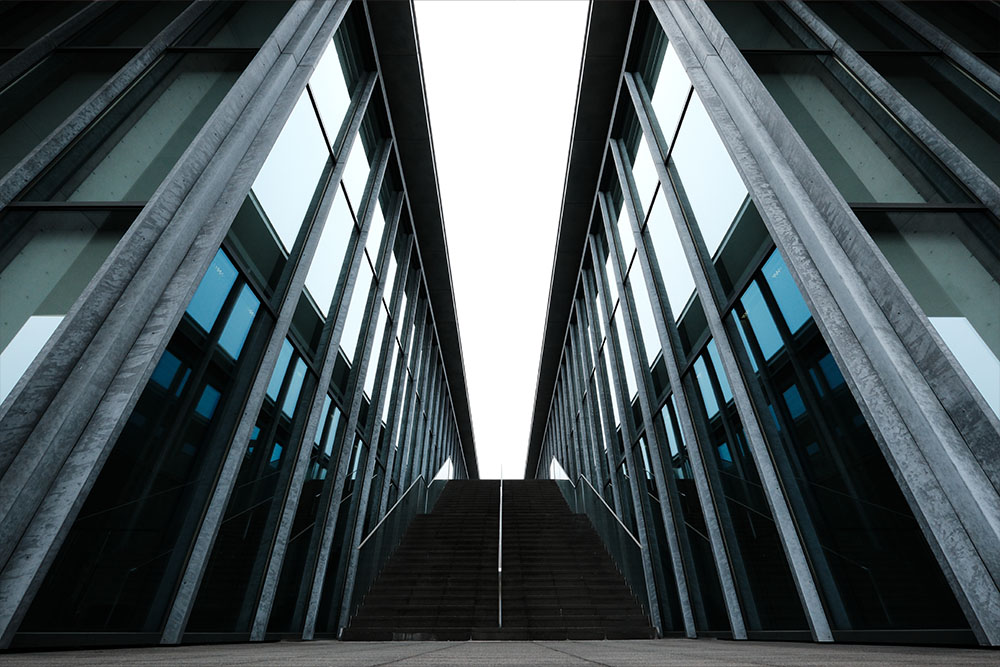
シメントリー構図

お次は左右対称、上下対称で成立する『シメントリー構図』です。
左右が同じ配置になることで安定感が増します。


作例は左右対称にこだわって撮影しました。
左右対称になることで、安心感のある写真に仕上がります。
作例
全く同じ左右でなくても、モチーフに均一さがあればシメントリーは成立します。
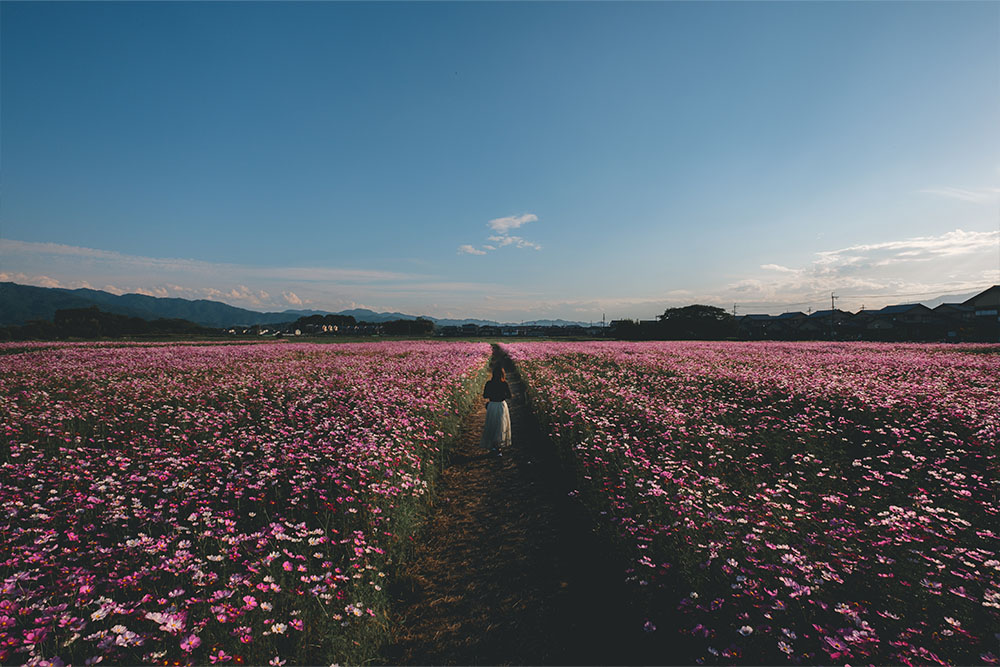
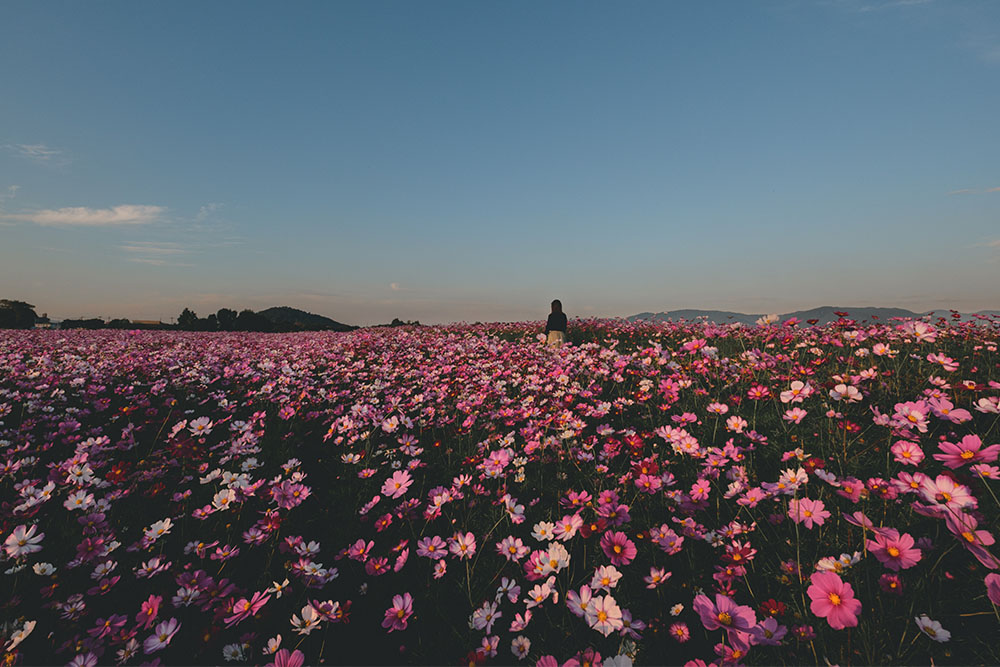
こちらはコスモス畑でシメントリーを作りました。
基本的にシメントリーは真ん中の線に頼る形になるので、二分割構図と日の丸構図との組み合わせは相性抜群。

駅やビルなどの建設物は左右対称のものが多いので、シメントリー構図は整えられた場所を狙うのも一つの手段です。
S字構図
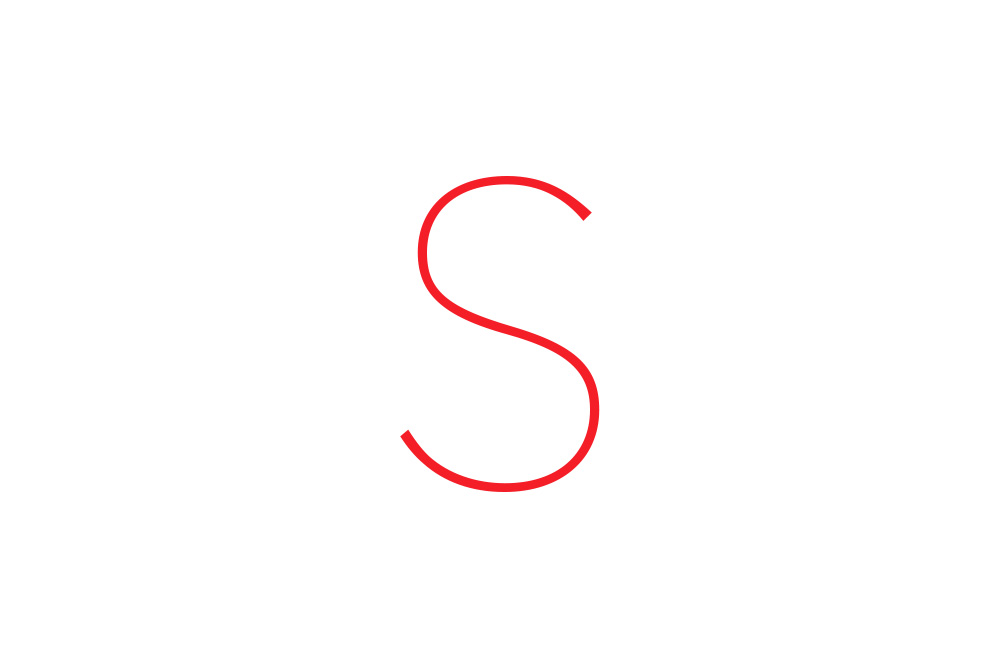
『S字構図』は、写真の中でS字のラインを感じられる構図のことをいいます。


一番分かりやすい例として、道のS字を利用したものがあります。
作例のようにS字が奥に向かって伸びている構図なので、道で走る車などを撮る際に使える構図です。
作例


こちらの作例は道にS字を感じさせるラインがある写真です。
S字のライン上に被写体を配置すると、構図が成立しやすくなります。
お次の作例のように、丸モチーフの連続でS字を作るケースもあります。
例えばテーブルフォトでお皿を数枚使うことで簡単にS字構図を生み出すことができます。
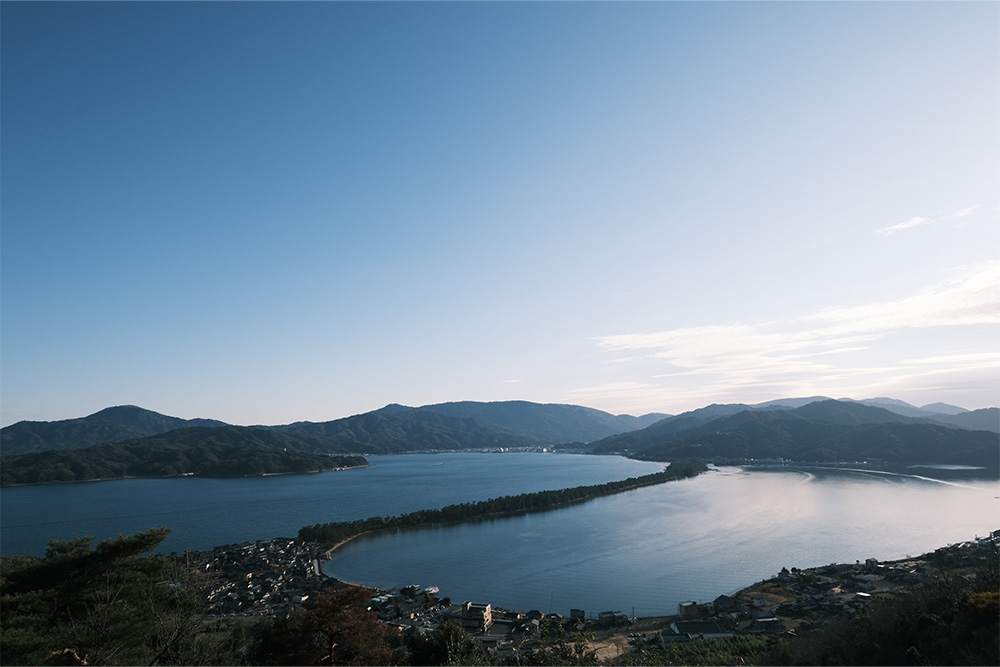
こちらは日本三景である天橋立です。
ちょうど中央の道のラインがS字になっています。
こんな例はほとんどないですが、自然の中にあるS字を活かす方法もあります。
黄金比構図

最後は上級者編の黄金比構図です。
黄金比とは、1:1.618の比率のことで、古代の神殿やAppleのロゴ、モナリザが黄金比と言われており、世の中のデザインや絵画にさりげなく使用されている構図です。
黄金比-kinoieブログ
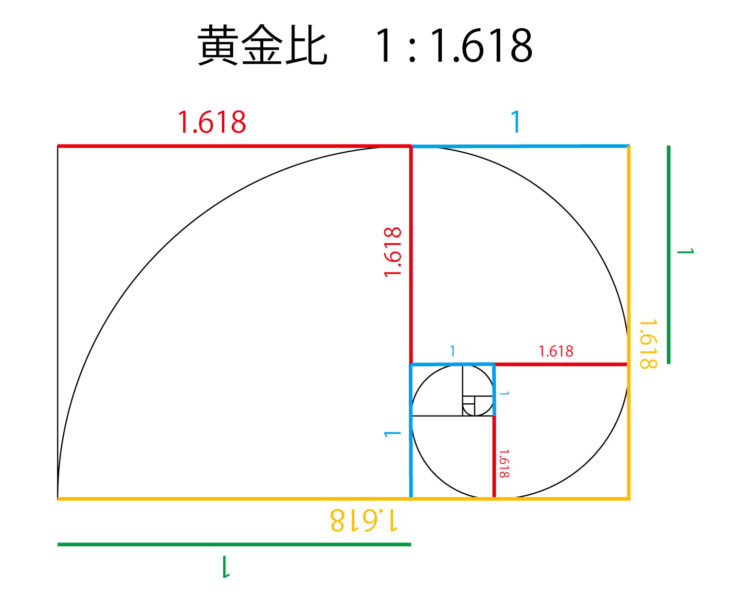
構図でいう黄金比は、写真のような渦巻き上のものをいいます。
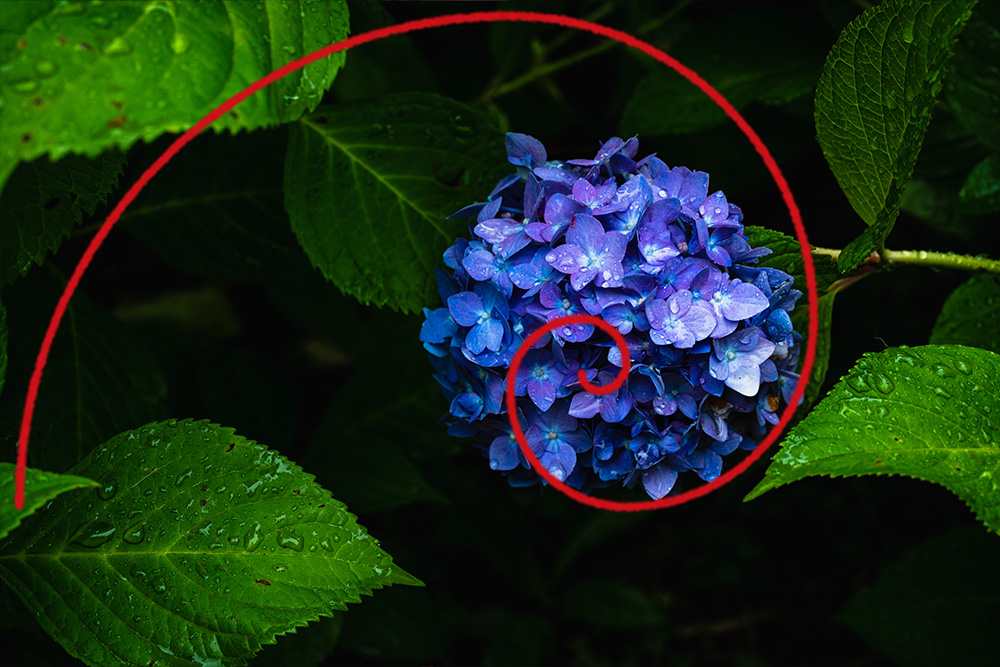
この渦巻きラインを使用した構図の作例がこちら。


作例のように、渦巻きのラインに合わせて被写体を選ぶことで、黄金比の構図が出来上がります。
作例


黄金比のラインに沿った部分があると構図が成り立ちます。
撮影のコツとしては、渦巻きっぽく見えるものを撮影して、後からきっちりとトリミングをする。
そうすることで、ちゃんと構図に落とし込めます。

渦巻きの収束部分に主題を置くことで、安定感と主張が取れます。

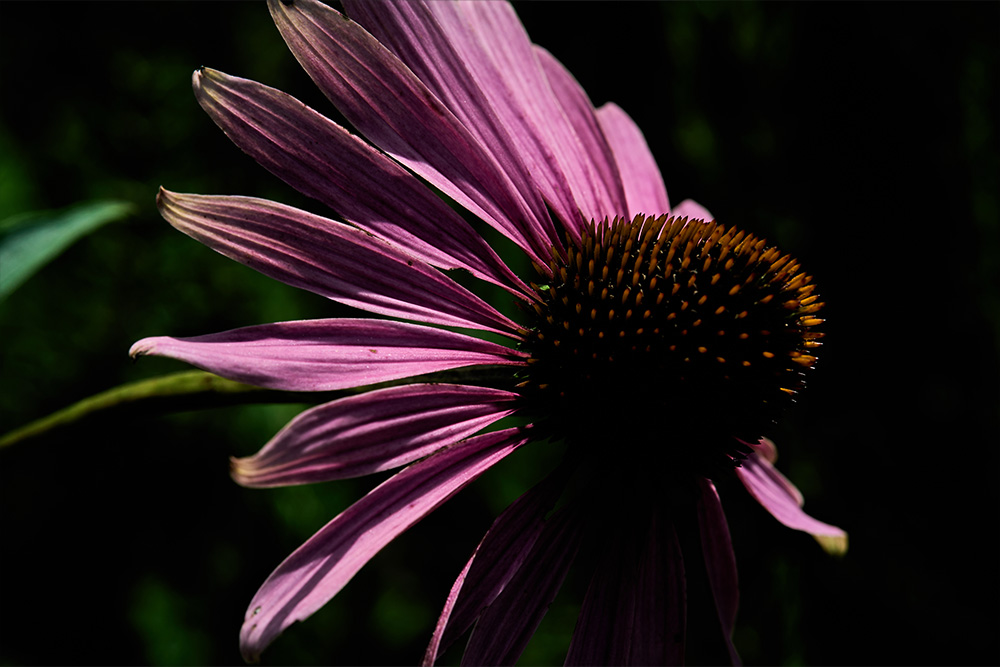
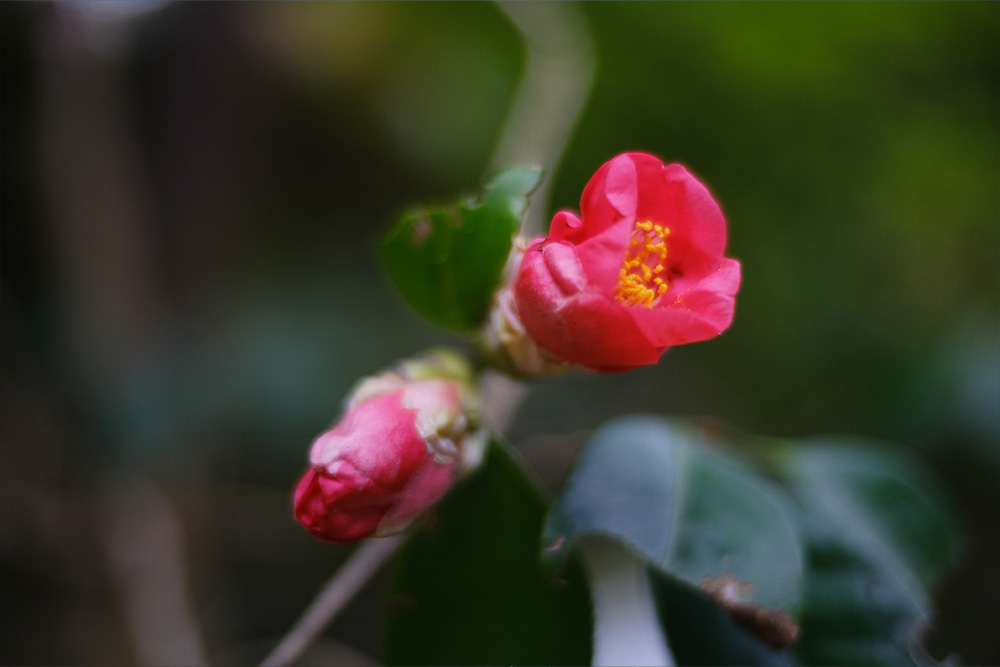
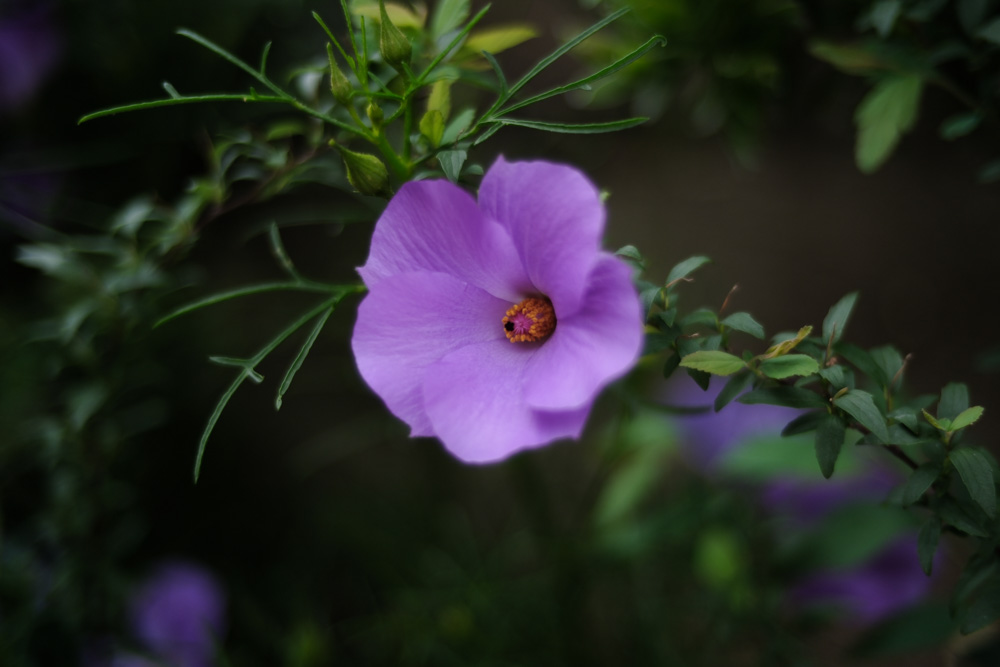
黄金比の構図は円形のものと相性が良いので、お花はおすすめの被写体です。
【まとめ】構図をマスターするにはとにかく撮るべし
今回は構図について詳しく解説してまいりました。
総括としては、写真の構図を学んだら、とにかく撮りまくりましょう!というのが最終のご提案です。
100の知識より1の行動。
場数を踏んだら、自然と心地良い構図で撮影できるようになるので、写真のクオリティが劇的にアップします。
この記事をきっかけに読者様の写真が上達すれば幸いです。
ご覧いただきありがとうございました。
カメラに関するオススメ記事
当ブログではカメラに関する記事が他にもたくさんございますので、ぜひほかの記事も見てみてください。


コメント